User Guide / Game Mode
How to use the YuKik One during a game

Sébastien LECOCQ
Last Update 2 jaar geleden
The performance sensor of your watch has been designed to be worn during your training sessions or matches and thus analyze your movements to extract metrics. This is called the game mode. The use of the performance sensor in this mode is done by wearing it on your calf, via the sleeve provided for this purpose.
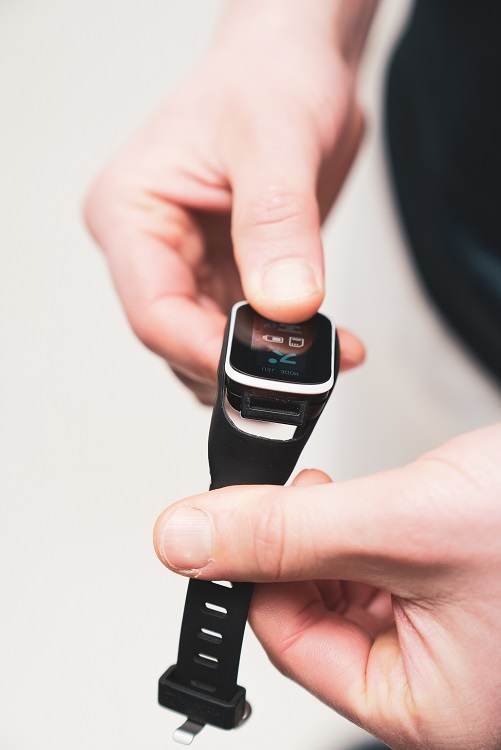
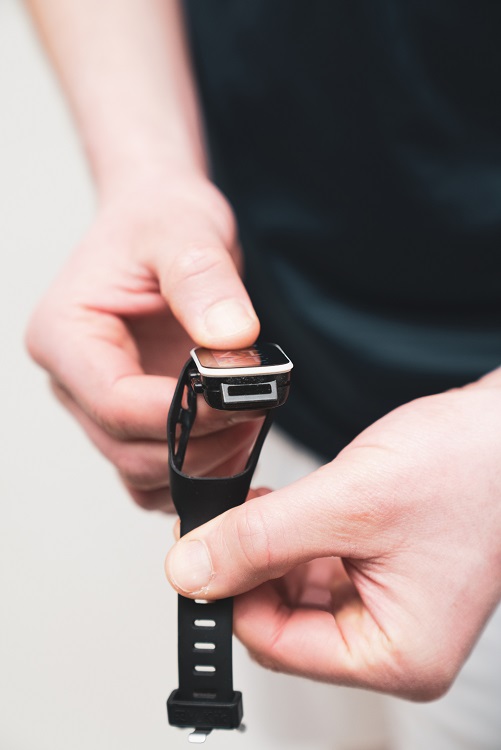
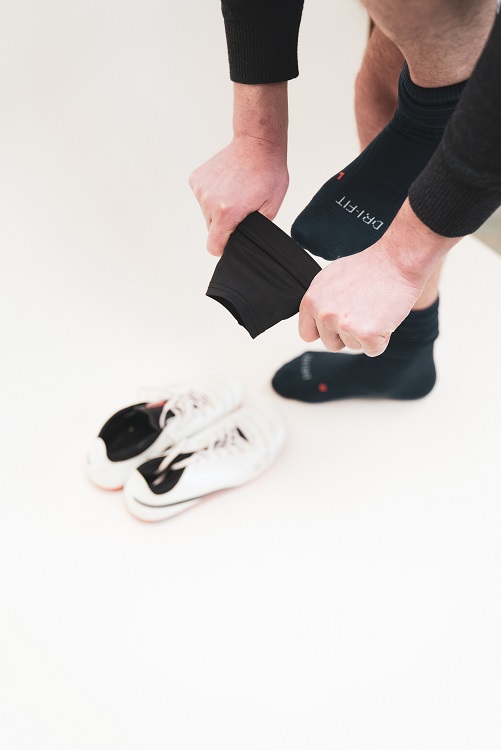
1) Sensor extraction
To start, you need to detach the sensor from the strap if it is not already done. Just hold it with one hand, while pulling on the strap with the other hand as shown on the pictures below. The sensor should come out without resistance thanks to the flexibility of the strap.
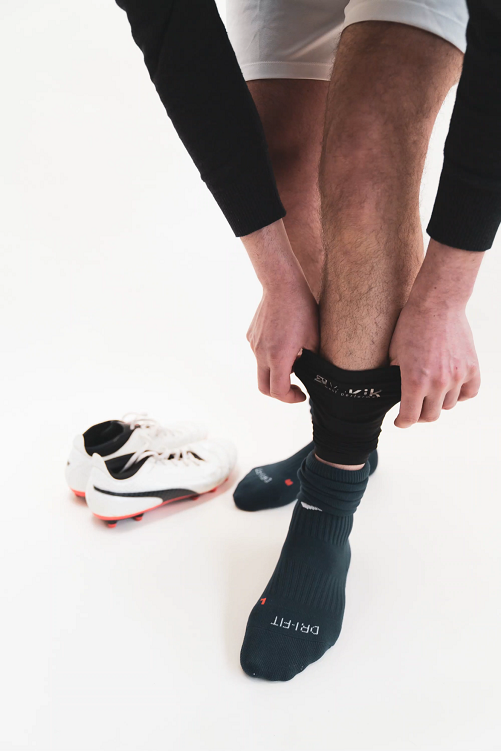
2) Putting the sleeve on
Choose a sleeve that fits you, child or adult, then slip it on your leg as if it were a sock. Be careful, it is very important to put the sleeve on your dominant leg (if you are a child, don't hesitate to ask an adult to choose the right leg).
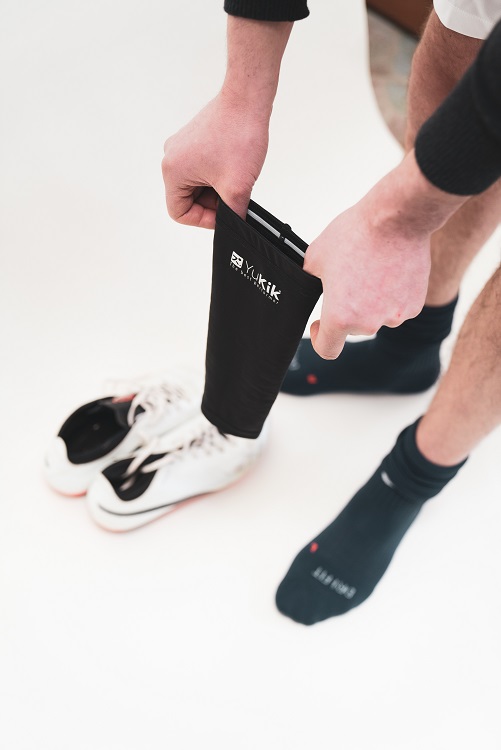
Do not pull the sleeve up to the top yet, as the sensor must be inserted first.
3) Start of the recording
Before the next step of inserting the sensor into the sleeve, it is possible to start recording the exercise on the sensor. Although this can be done later as well, it is sometimes easier to do this action with the sensor at hand and access to its display, rather than after insertion into the sleeve.
However, if the waiting time before the actual start of the exercise is too long, we recommend that you start the recording at the last moment, so as not to disturb the results with actions and game time that do not correspond to the exercise (waiting in the locker room, warm-up, etc.).
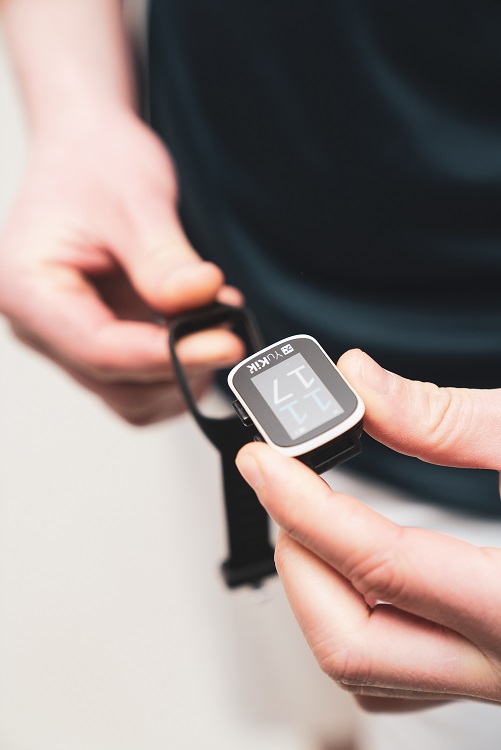
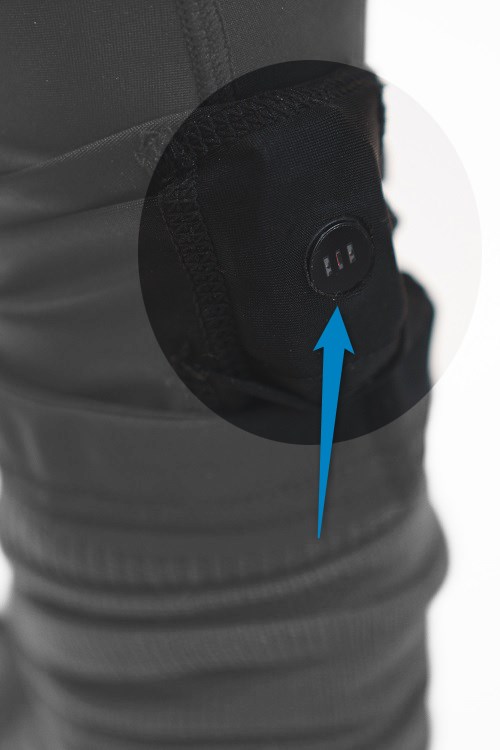
To start recording, you have to go to the game mode screen on the sensor. The fastest way to do this is to press once on the button at the bottom right of the sensor. It is a shortcut that takes you directly to the game mode.

Once in the game mode screen, you can see the battery capacity, as well as the internal memory filling to make sure that the sensor will be able to record your exercise without problems. If you notice that one of these two indicators is displayed in red, you need to charge the sensor or empty its memory by synchronizing with the application, as detailed in this document.
To start the recording, just press the button on the bottom right again. The sensor vibrates to confirm that the recording has started and the screen displays a counter of the recording time that increases. The screen automatically turns off after a few seconds to save battery life.


Your sensor is now ready to be inserted into the sleeve.
4) Inserting the sensor
The sleeve is equipped with an inner pocket to insert the sensor and it is very important to pay attention to the insertion direction.
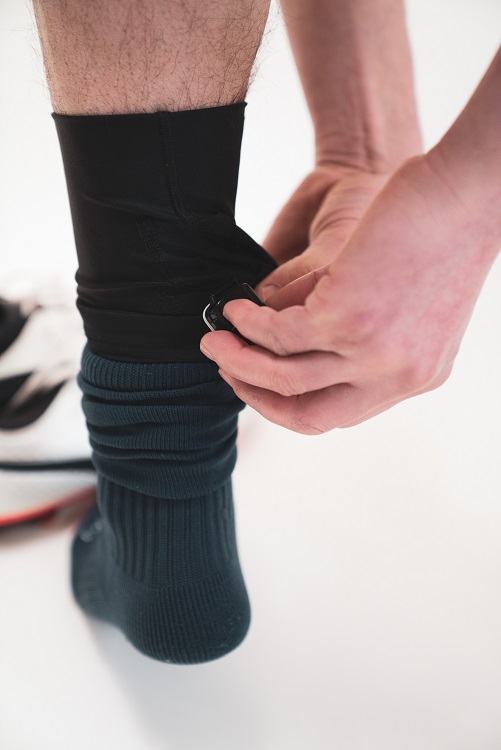
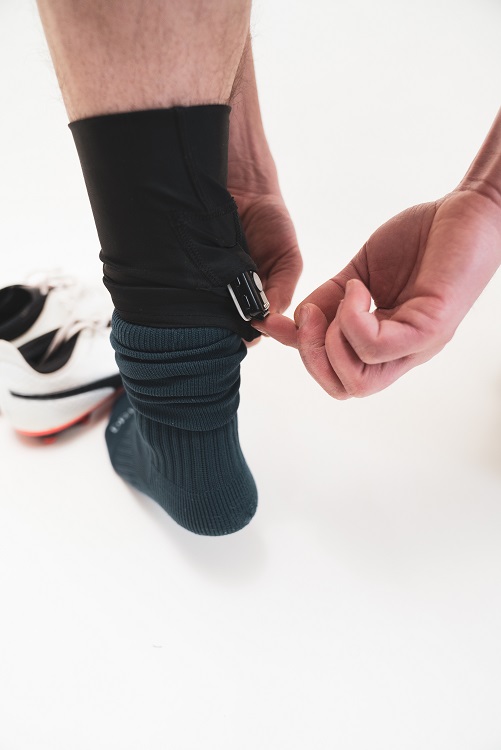
When inserting, the metal pins should be inserted last and thus face the top of the pocket.
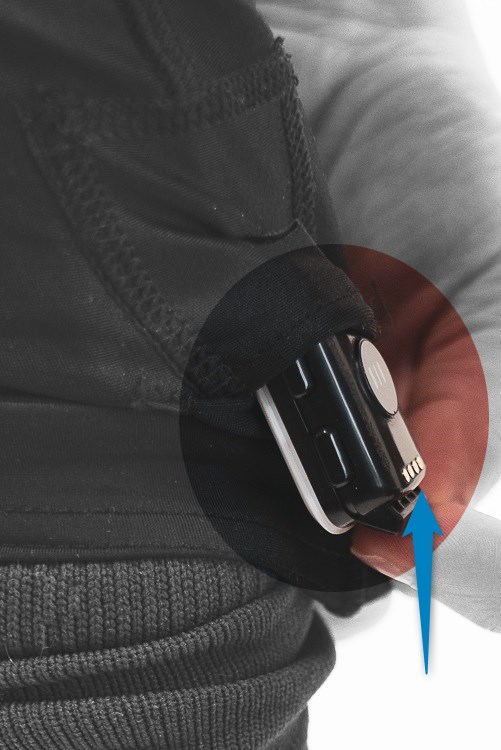
The heart rate sensor must also be correctly aligned with the hole dedicated to this purpose. This will allow the sensor to measure your heart rate during your exercise. When the heart rate sensor is activated, the green LEDs flash very quickly and you can then check that the sensor is properly aligned with the hole.
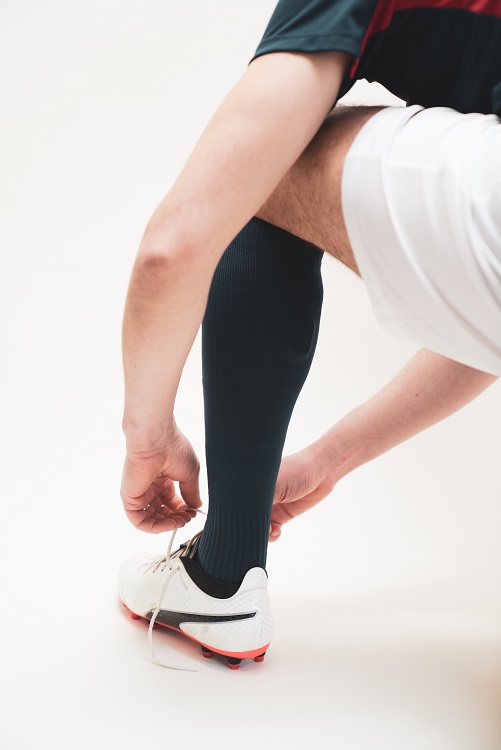
Now you can unfold the sleeve to its full height, so that it is most comfortable for you, then put on or pull up your sock and put on your shoes.

Although this article shows how to install the sensor after putting the sleeve on your leg, it is possible to insert the sensor in the sleeve before putting it on and to start recording the exercise once the sensor is in place on your leg, taking care to lower the sock that would be over it. The screen of the sensor is bright enough to be visible through the fabric of the sleeve so that the operation is done by the player himself.
With time and practice, you will find the method that works best for you. Just make sure you follow the insertion rules mentioned above.
Now it's your turn! You can start your training exercise or your soccer game. The YuKik One sensor records your movements discreetly.
5) Stop the recording
To stop recording, simply press any button to turn on the sensor screen, then press and hold the bottom right button for a few seconds until you feel a confirmation vibration.

The sensor displays the end of recording screen and you can move to the other screens, including the time screen for example, by pressing the button at the bottom right.

6) Synchronization
Processing of your exercise is carried out using the YuKik app for iOS or Android, and requires you to launch a synchronization with the sensor. The synchronization method differs according to the application used. It will be performed using the docking station and Lightning adapter for iOS, and via Bluetooth for Android. The following information will guide you step by step through the synchronization process.
6.1) Synchronizing with an iOS smartphone
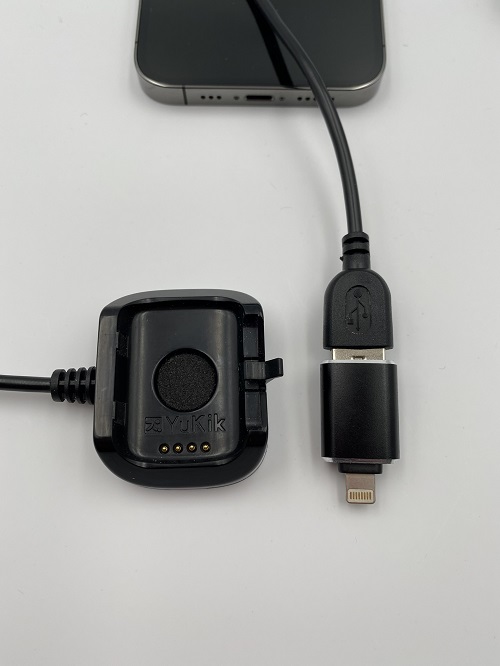
To synchronize your exercises with the YuKik for iOS application, you need to use the docking station and the Lighning adapter supplied, and it's important to follow the order described in this section. First connect the Lighning adapter to the docking station.
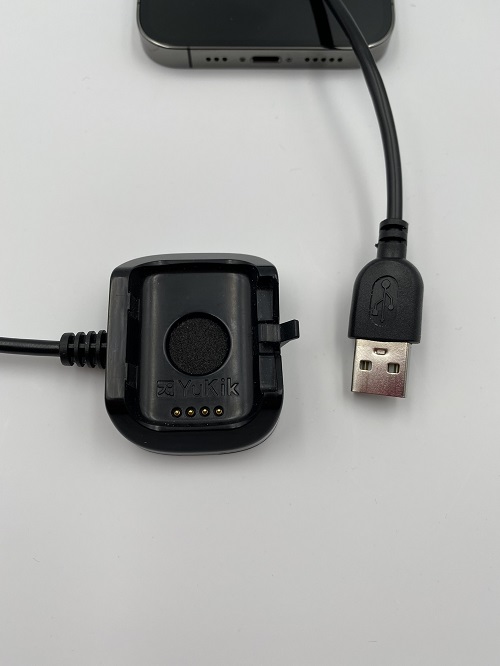
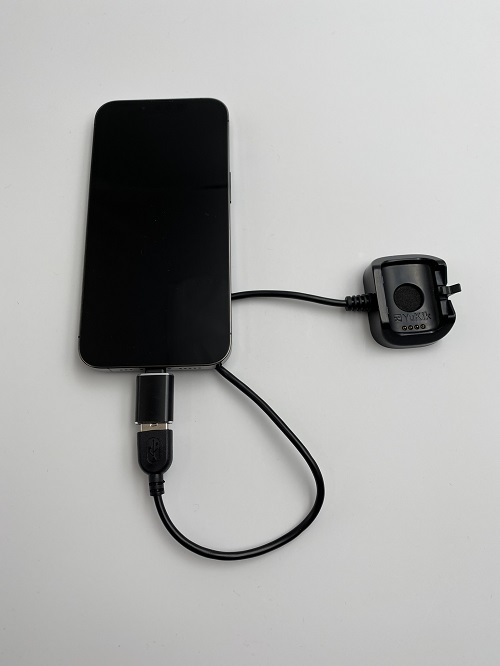
Then connect the docking station to your iOS smartphone.
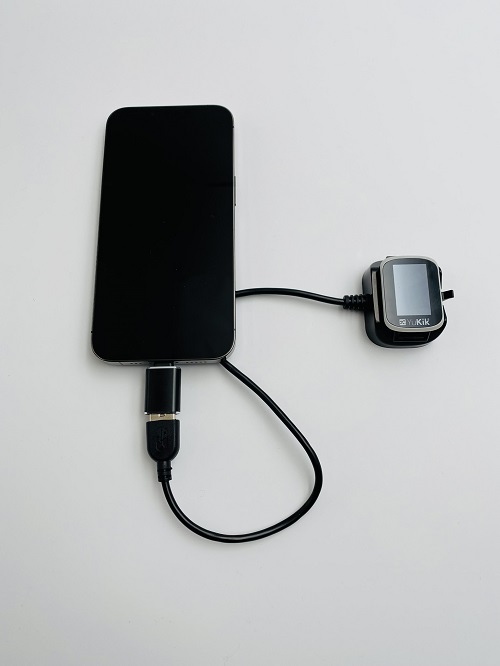
Finally, insert the sensor into the docking station.
Once the sensor is connected, launch the YuKik application and log in if necessary. On the bottom navigation bar, tap the Sensor button.

In the My sensor page that opens, tap the Synchronize button to start the process.

Synchronization includes both the transfer of daily activities data (heart rate, number of steps and rest time) and the possible transfer of recorded exercises. The synchronization duration is more or less long depending on the quantity of data to be synchronized. We recommend that you perform a synchronization regularly (at least once a day and after each exercise) in order to optimize the synchronization times, and to avoid any saturation of the internal memory.

When the application detects that recorded exercises are available in the memory of the sensor, it offers the synchronization of these exercises. Tap on Yes to be able to select the exercises to synchronize.

The application then displays a wizard that explains the different operations to be performed. We recommend that you carefully read the displayed instructions that we will repeat in this guide. It is at this stage that you can connect your sensor using the docking station and the Lightning adapter.
Once you have read these instructions, tap the Next button and then Select.


The app displays the iOS built-in file picker. This tool is common to all applications including the iOS native Files application, so the location displayed when opened depends on the last use that may have been made of this selector.
To go back to the root of all locations, double tap on the botton right button named Browse. You'll then see all the available locations, inlcuding one that is named Yukik corresponding to your sensor content. Tap on it to browse it. Note: if your sensor does not appear in the list of locations, do not hesitate to eject it from its workstation, and plug it again, or restart it via the interface, then reconnect it once it is restarted.


In the SportSensor folder, each exercise is represented by a file whose name includes the date and time of the exercise. You can select one or many files at the same time and then tap on the Open button in the top-left corner.


When you validate your selection, whether for a single file or several, the copy of the files starts and the file selector remains open until it is finished (even if no other action is possible in the file selector and it seems frozen to you, this is not the case and please wait for it to close). Then the process goes back to the application and the synchronization process continue.

The synchronization ends and the last synchronization date is updated. Exercises files are transmitted to the YuKik platform which process them and calculates the associated performance metrics.

You can click on the notification to be redirected to the exercise results.

6.2) Synchronizing with an Android smartphone
On the bottom navigation bar of the YuKik App, tap the Sensor button to go in the My Sensor page. Then tap the Synchronize button to start the process.

Synchronization includes both the transfer of daily activities data (heart rate, number of steps and rest time) and the possible transfer of recorded exercises. The synchronization duration is more or less long depending on the quantity of data to be synchronized. We recommend that you perform a synchronization regularly (at least once a day and after each exercise) in order to optimize the synchronization times, and to avoid any saturation of the internal memory.


When the application detects that recorded exercises are available in the memory of the sensor, it synchronizes these exercises and displays a progress bar. It is important that you keep the YuKik App open during the entire synchronization process.

The synchronization ends and the last synchronization date is updated. Exercises files are transmitted to the YuKik platform which process them and calculates the associated performance metrics.

You can click on the notification to be redirected to the exercise results.
